
In this guide, we’ll walk you through using Make.com (formerly Integromat) to set up an automation that sends personalized emails directly from Google Sheets. This can save you a lot of time, especially for businesses or individuals who need to send bulk emails.
Quick overview (what you’ll use)
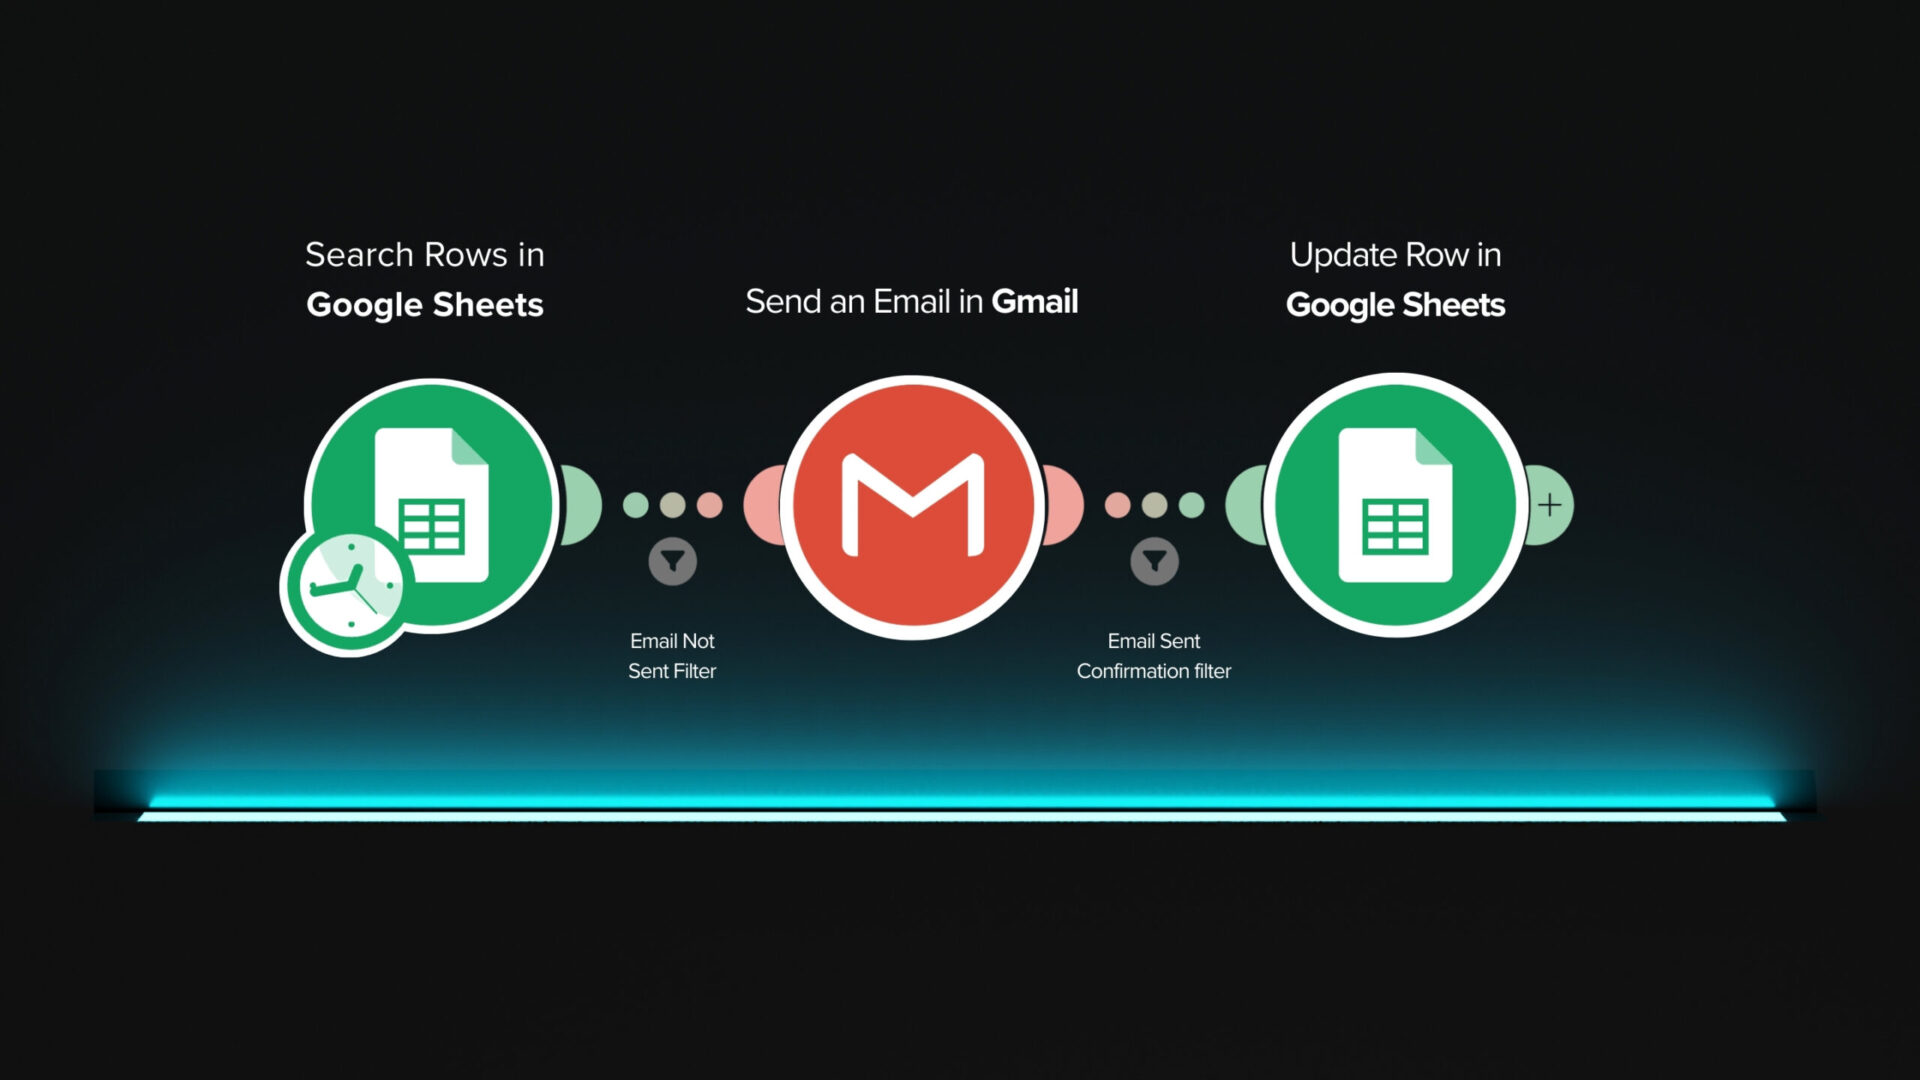
- Google Sheets › Search Rows — retrieve rows from your spreadsheet.
- Gmail › Send an Email — send the personalized message.
- Google Sheets › Update a Row — mark rows as
Sentafter successful delivery. - Filters — prevent duplicate sends and ensure the row is only updated if Gmail returns a Message ID (i.e., send succeeded).
Step-by-Step Guide:
Step 1: Create a Google Sheet
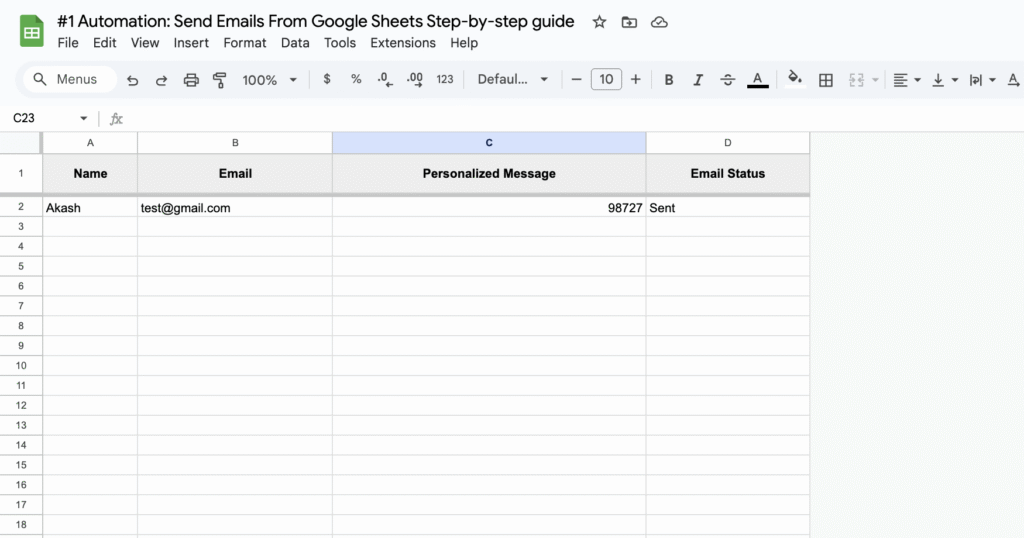
Start by creating a Google Sheet with columns for the email recipient’s details, such as:
- Name
- Personalized Message
- Email Status
Step 2: Sign in to Make.com
Go to Make.com and sign in or create an account.
Step 3: Create a New Scenario
Once you’re logged into Make.com:
- Click on Create a New Scenario.
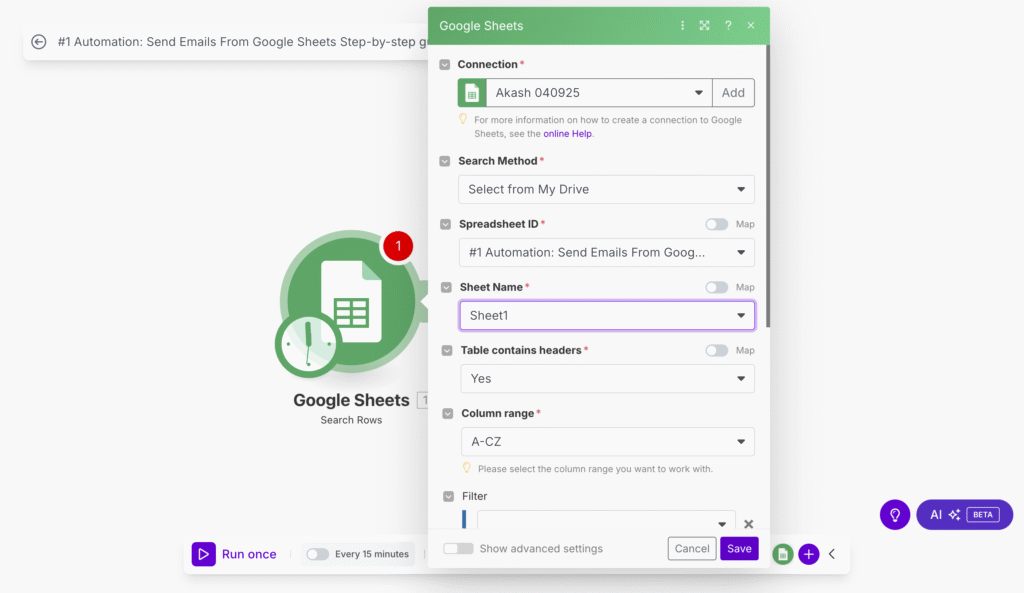
- Search for Google Sheets and select it.
- Select the Watch Rows trigger, which watches for new rows in your Google Sheet.
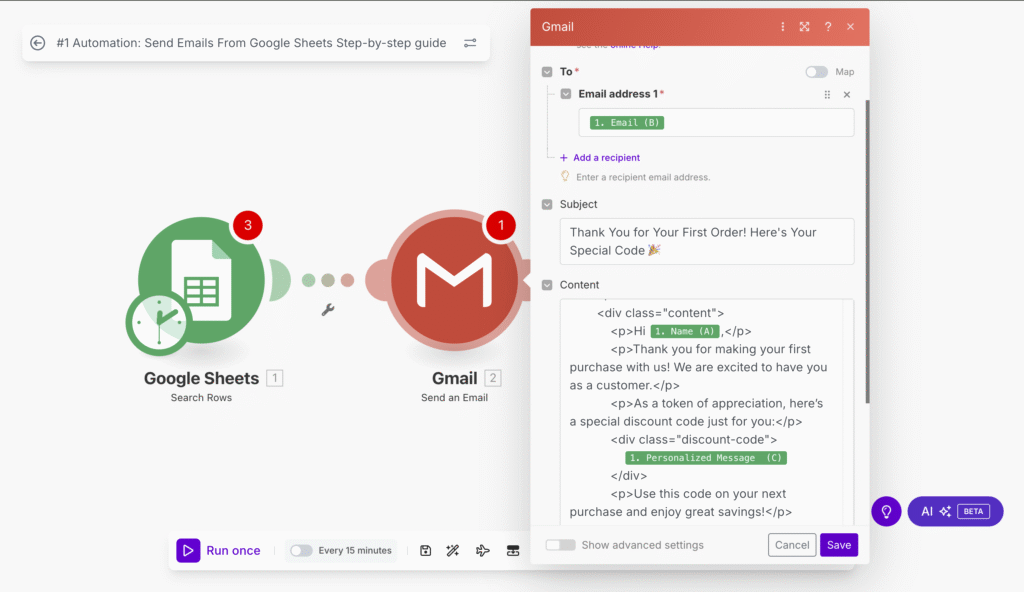
Step 4: Add Gmail or Any Other Email Service
- In the same scenario, add an Email module. You can use Gmail, Outlook, or any other email service provider you want to use.
- Select the Send an Email action.
Step 5: Map Your Google Sheets Data to the Email
You will need to map the data from your Google Sheets to the email content:
- Click on the email address field in the email setup, then select the email column from Google Sheets.
- Do the same for other fields, such as the recipient’s name, subject, and body of the email.
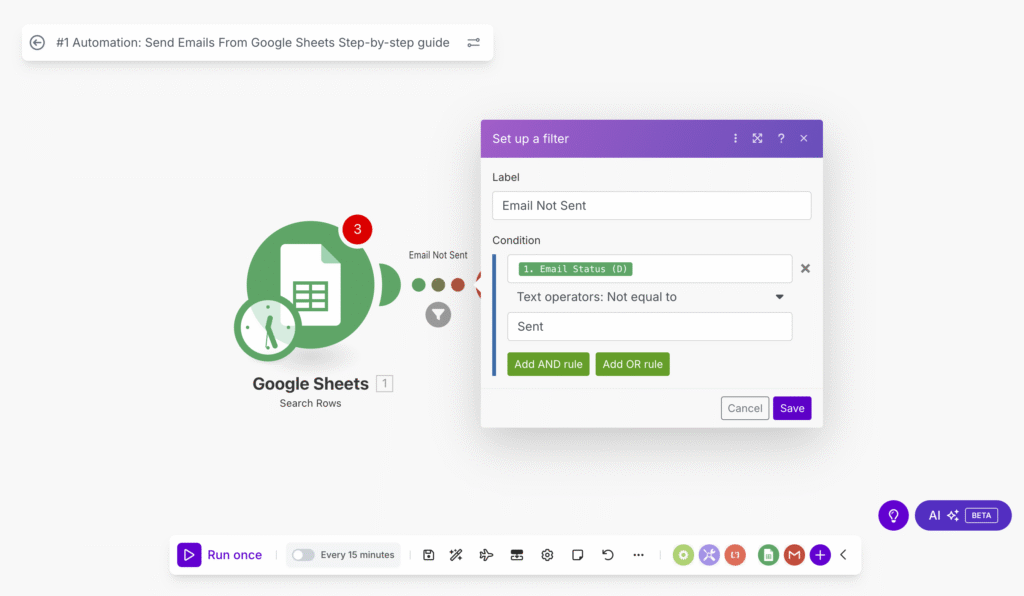
Step 6: Add a Filter to Prevent Sending Duplicate Emails in Make
To avoid sending duplicate emails to recipients, we can add a filter between the Google Sheets “Search Rows” module and the Gmail “Send an Email” module.
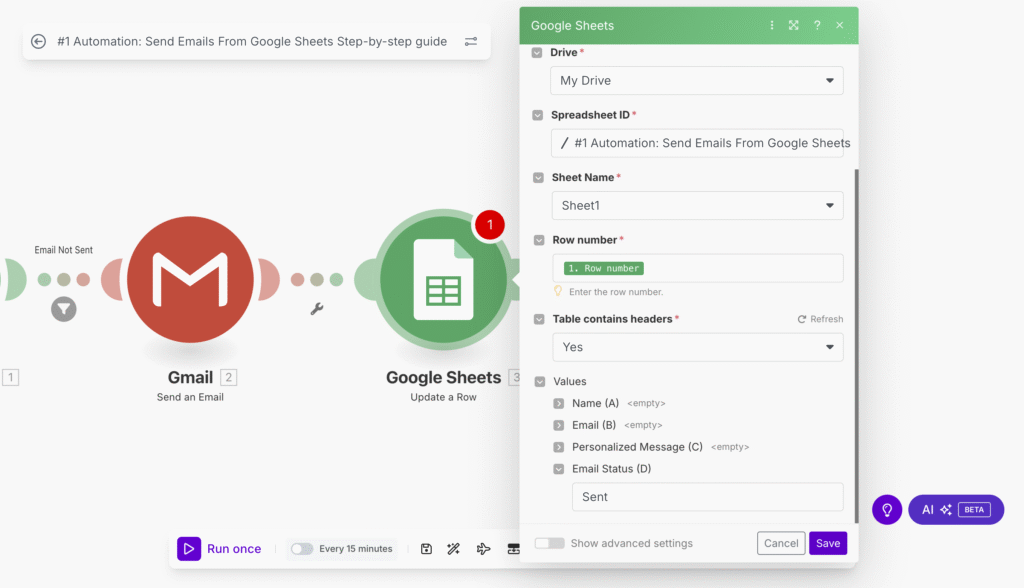
Step 7: Add the “Update Row in Google Sheets” Module
After sending emails to recipients, you need to update the Email Status in your Google Sheet to mark the email as “Sent.”
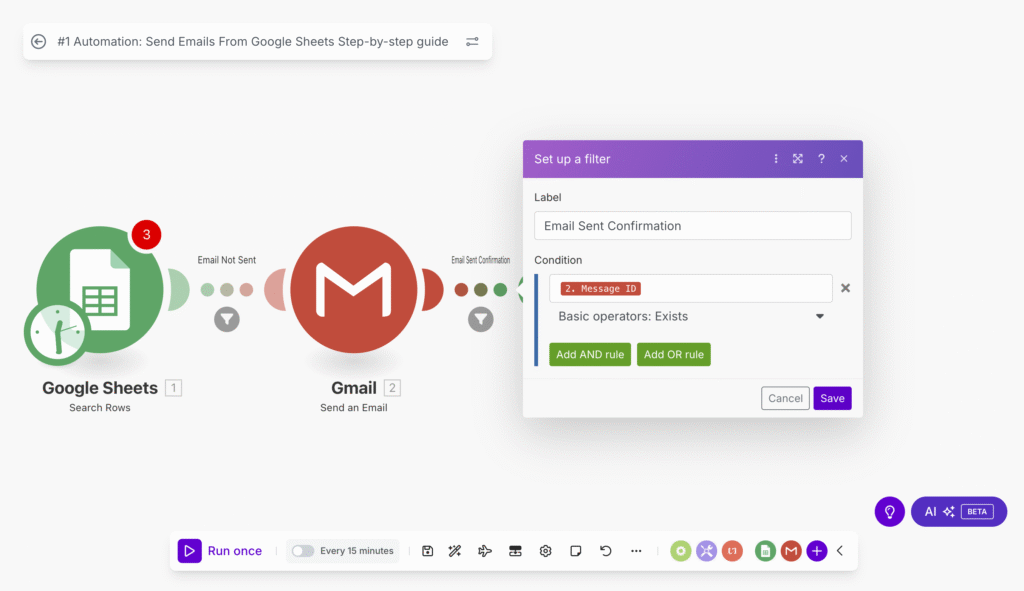
Step 8: Add a Filter Between “Send an Email” and “Update Row” Modules
To ensure that Make only updates the Google Sheet row’s Email Status to “Sent” after the email has been successfully sent, we need to add a filter between the Gmail > Send an Email and Google Sheets > Update a Row modules.
Step 9: Test and Run the Scenario
To test the scenario, click Run Once in the editor. If set up correctly, you’ll receive a test email, and the Email Status in the Google Sheet will update to “Sent.” Replace the test data with real recipients and run the scenario again to send emails.
Bonus: You can directly use this template by importing the scenario
Simply download the JSON code and import it into your canvas. Here’s a quick guide on how to do it:
- Download the JSON Code: Get the JSON template file for the scenario.
- Import into Make: In your Make dashboard, click on Create a new scenario and select Import. Upload the JSON file.
- Configure the Scenario: Once imported, you may need to connect your Google Sheets and Gmail accounts to complete the setup.
- Run the Scenario: After configuration, click Run Once to test and ensure everything works.
Join Our AI Community:
Are you interested in learning more about automating your workflows with AI and tools like Make.com? Join our AI community to stay updated on the latest tips, strategies, and tech.
Need Help? Let’s Connect:
If you need any assistance with setting up your own automation, feel free to reach out. We’re here to help you take your email marketing and workflows to the next level